Fully hand-held tutorial on setting up the Java environment to a usable state as quickly as possible. Only knowledge of using the terminal is expected. This tutorial will be completely self-contained (excluding links to downloads).
For more detailed tutorials, see General Development Environment Setup Guide
Ubuntu
(in progress)
Java
Open a terminal and run
sudo apt install openjdk-17-jdk openjdk-17-doc openjdk-17-source
Gradle
We are currently on Gradle 7. We will install it manually for ease of understanding. The official guide is here for reference. (Aside: we do not use the Gradle Wrapper)
- Download the latest Gradle 7 distribution (7.4.2 as of writing).
- Choose the "complete" version.
- Remember where you downloaded it.
Unpack Gradle (the following are excerpted from the gradle website)
cd into the directory where you downloaded Gradle. Then
- Unzip the distribution zip file in the directory of your choosing, e.g.:
$ mkdir /opt/gradle
$ unzip -d /opt/gradle gradle-7.4.2-all.zip
Add to path
- In File Explorer right-click on the
This PC(orComputer) icon, then clickProperties->Advanced System Settings->Environmental Variables. - Under
System VariablesselectPath, then clickEdit. Add an entry forC:\Gradle\gradle-7.4.2\bin. Click OK to save.
- In File Explorer right-click on the
Verify installation
- Open a console (or a Windows command prompt) and run
gradle -vto run gradle and display the version, e.g.:
$ gradle -v

------------------------------------------------------------
Gradle 7.4.2
------------------------------------------------------------
- Open a console (or a Windows command prompt) and run
- Configure for IHMC software
- excerpt from Gradle#Installation
- create gradle.properties file in C:/Users/user/.gradle/gradle.properties
- Copy/paste
org.gradle.java.home=C:/Program Files/Java/jdk-17.0.3.1
org.gradle.jvmargs=-Xmx4g
IDE
Windows
Git
- Install Git. Use the 64-bit standalone installer
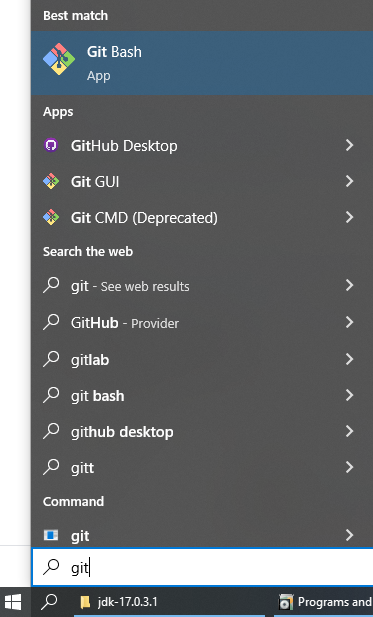
This will be used for all terminal interactions on Windows. Access by searching for Git Bash on the windows search.
Hereby, "open a terminal/console" will refer to launching git bash.
Java
We use Java 17.
- Go to the Oracle download page and download the MSI installer:
This will download Java to the folder (or as appropriate for the version)
C:\Program Files\Java\jdk-17.0.3.1
- (Aside: The java path variable is already set using oracle. No action is needed)
- Double-check that java is installed properly:
Open a terminal and type in:
java -version
Something like the following should be outputted:
java version "17.0.3.1" 2022-04-22 LTS
Java(TM) SE Runtime Environment (build 17.0.3.1+2-LTS-6)
Java HotSpot(TM) 64-Bit Server VM (build 17.0.3.1+2-LTS-6, mixed mode, sharing)
Gradle
We are currently on Gradle 7. We will install it manually for ease of understanding. The official guide is here for reference. (Aside: we do not use the Gradle Wrapper)
- Download the latest Gradle 7 distribution (7.4.2 as of writing).
- Choose the complete version.
- Remember where you downloaded it.
Unpack Gradle (the following are excerpted from the gradle website)
- Create a new directory
C:\Gradlewith File Explorer. - Open a second File Explorer window and go to the directory where the Gradle distribution was downloaded. Double-click the ZIP archive to expose the content. Drag the content folder
gradle-7.4.2to your newly createdC:\Gradlefolder.
- Create a new directory
Add to path
- In File Explorer right-click on the
This PC(orComputer) icon, then clickProperties->Advanced System Settings->Environmental Variables. - Under
System VariablesselectPath, then clickEdit. Add an entry forC:\Gradle\gradle-7.4.2\bin. Click OK to save.
- In File Explorer right-click on the
Verify installation
Open a console (or a Windows command prompt) and run
gradle -vto run gradle and display the version, e.g.:$ gradle -v ------------------------------------------------------------ Gradle 7.4.2 ------------------------------------------------------------
- Configure for IHMC software
- excerpt from Gradle#Installation
- create gradle.properties file in C:/Users/user/.gradle/gradle.properties
- Copy/paste
org.gradle.java.home=C:/Program Files/Java/jdk-17.0.3.1
org.gradle.jvmargs=-Xmx4g
Import Repositories
Don't forget the long paths thing
IDE
Choose your favorite IDE. I like intellij because it was the first IDE I arbitrarily chose to use.
Eclipse
full guide: Eclipse IDE
Intellij
full guide: IntelliJ IDEA
- Download IntelliJ Community. Choose the .exe for convenience
- https://www.jetbrains.com/idea/download/#section=windows
- All default installation options are fine.
- Now you will need to configure IntelliJ to the Java environment you installed.
- Your environment should be ready at this point. Import repository-group.
- File > Open > select repository-group
- Your projects bar should look like this:
depending on the repositories you imported. All software should now be runnable.
Usage:
- Upon each launch, IntelliJ will index your files for faster searching. You will need to wait for it to finish before navigating code.


